Saturday, November 29, 2008

Celebrating 60s together

Hi, we are all 60s this year, except #9 ;)

Thus we chose to celebrate this important year of our journey in life together, in Penang, on 22nd November, 2008

After some introduction, I read out an earlier e-mail specifying that all MUST wear our "brotherhood ring".


This is the "brotherhood ring" which we tailor made from Hong Kong in 1967, before we completed Form 6 and went to different universities all over the world.

The 9 rings symbolized 9 brothers, and the bell at the center stood for CLHS.

Every ring is individualized.
This is mine, and carries a "3" at the center of the bell.


Being the only defaulter:), #8 was scratching his head, trying to give all sorts of excuses........
while the wife sportingly smiled in consent, haha!


During planning, we had earlier decided that this expensive dinner would be shared equally.....


but all present happily voted that he should pick up the bill, after all, he is one of the most loaded, hehehe
Thanks to Cresendo!

I must not forget to mention #9, who had also 'generously' picked up the bill on the dinner a night before..........
Thanks to KimLoong


Finally, 7 of the 9 brothers could make it to this party!
All, except #5 and #7, the 2 who suffered Permanent Head Damaged! ( PhD )

Let's hope there will be some stem cell cure soon, so that they can join us in the near future.


We were all so glad that #4 and wife flew in just for the night, and then went back the next day!

This is the spirit we need!

Whisky poured, XO bottoms up!
We really had a gala time.........

......so much laughter and tears!


#6 ordered some special food for the night.

Well, the general opinion is.......quite good lah!


The first dish was double lobster with crab claws.


This was really some thing special.
A whole piece of large sharks fin doubly braised in superior soup.


The sucking pig was so good that it was gone in 5 seconds, leaving only this little tail for #1 to capture.


Braised abalone with Broccoli.
I felt that the abalone was a little too hard.


This was a good dish.
A 1.5 Kg " 游水七星班 "
.......steamed to perfection.
Excellent!


This was the additional dish requested by #8 the previous night before he realised that he had to pick up the bill :)

His favourite, Ab Bee's too?


The only vegetable dish for the night.
Some tried to avoid too much vegetables for fear of " horns " growing out from the forehead!

Just imagine, from this small plate, there were still some left over....


Oh ya, this was another additional dish requested by #8, even after he realised who was the host for the night. Good brother!

His theory is that we need some "長壽麺", since this is a birthday party.


The grand finale:

We had ample deserts, 3 types!
Excellent!
But by then, we were all too full...

Thank you #8, for your generosity :)

For all the laughter we had for the night, he said it's worth every cent of it!


Then we adjourned to our house for more programs.

Unfortunately #2 was too drunk and had to be sent back to his house before everyone turned up.
It's already 11:00pm

This is the special cake ordered by Suan See.


We first watched a special slide show capturing our life since CLHS, how we started this "brotherhood"

It took us all back through a nostalgic path in the 60s, 70s and early 80s, covering our trips to Penang Hill, Cameron Highlands, Johore Ulu Tiram, Genting Hhighlands, and outings at The Penang Botanical gardens etc.
Wow, how time flies.......everyone gets a copy.
I will send one to #5
Then we cut a cake.


The wives did what they do best, serve....;)


While the men did what do best, eat!


This was the only representative from the second generation, Kai Chiean, #8's last successful attempt!

He was also our photographer.


More eating by the brothers


And more here!


This was the final picture taken.
#1 then gave a short speech before we called it a day!

Happy time passed so fast.
It's already past 1:00 am when the party was over.

All the wives enjoyed so much and they informed us that they had decided that such gathering should be an annual event!


What else can we say, brothers?

See you next year!

Monday, November 24, 2008

Plumbing + Electrical

After the roof trusses arrive, they installed them. Then nail plywood over the top. After that, another waterproof material is layered over the plywood. The first big rain of the season came right after we installed the waterproof layer over the plywood... phew. We got really lucky there. Also they have to make a cut through the waterproof layer and plywood at the ridge of the roof to create ventilation. After that, they installed the shingles and the ridge vents.


Finally, a pitched roof!! First feature complete... :)

While the weather was sucky a few weeks ago, they have been working on the electrical wiring. I didn't know installing recessed lighting is so easy. Just look that this picture below. They are nailed in between the bottom chord of the 2 trusses. Then adjust to the location you want. Then wire it up! Simple! I guess when you have the ceiling there, the wiring part becomes more tricky. BTW, 4" recessed lights are more expensive than 6".


Next the plumbing. This step is also painstaking. We have to pick up all the valves and plumbing system that we want. But also need to decide which shower head, what type, what system, what type of shower pan. After all that, still need to decide the height to install the knobs, the faucet. Aargh... So many things. Here is a picture of the rough plumbing for the master bathroom. Notice the valves (black color covered), from the top to bottom. They are 3-way transfer valve to the volume control valve, and finally the thermostatic valve. Thermostatic valve is a fancy name for temperature control. Did I mention those copper pipes comes in 2 sizes, 1/2" or 3/4"? Which one would you like?


Did I mention the duct work for the heater? We also installed new ducts for the new furnace. So have to decide where the outlets for all the air duct. And we need a central air return path in the middle of the house. I guess that make sense, like electricity, you need a ground wire.


The contractors have been working on plumbing, electrical, duct work for a while now. These are small things that is really time consuming, and don't really produce too many interesting pictures.

Friday, November 07, 2008

Pre-fab Roof

These pictures are taken 2 weeks ago. Our pre-fab roof truss arrived in a trunk from Sacramento. The roof dimensions are customized to the house. I was so stressed when trying to finalize the measurement before the framing of the new side complete.

The trusses are pretty cool, it came in a trunk as follows.


Then the operator uses the crane on the front of the truck to lift each segment of the trusses and set them onto the house.


Once they are set onto the roof, they have to be properly secured to prevent them from falling. After each segments are properly secured, the house looks like this.


After that, the contractors spent the next of 2 days installing the trusses piece by piece. That's when Shirley Ave turned from a flat into a pitched roof. Plywood is then installed on top of the trusses, then they stapled the waterproof material on top of the plywood just in time before the winter storm arrives last week. Phew!


While that's all happening, someone just chills...

Saturday, November 01, 2008

Framing

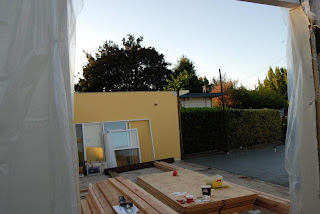
These pictures are taken 2 weeks ago when we finished the framing in the new part of the house. Note that the front yard has shrunk.


Sunday, October 26, 2008

Pumpkin Carving

What to carve what to carve?

Meeku and Rafiki...
Matt and my pumpkin
Derrick's pumpkin

Amy's pumpkin
The artists with their jack o lanterns

Sunday, October 19, 2008

Nangka

Choon Ping and Pei-Sun brought over a nangka (jackfruit) today....

At the store, the checkout clerk thought it was a durian.... and charged them $1.49/lb instead of $1.99/lb....

Look at Pei-Sun cutting up the delicious fruit... We all enjoyed it very much.... It's my first time eating nangka in the US....

Ice-cream


Have you tried these before? Ching Tji says yummy..yummy.
We'll bring you some to HK when possible, okie?

Tuesday, October 14, 2008

Foundation Done!

Some updates for our renovation project....

After all the sewage and other piping was in place and inspected, the progress for the foundation nearly came to an end as well. The re-bars & other embedded elements were secured in place and inspected by the City last Thursday, before they could pour the concrete in. A special inspection was done on last Saturday as well... meaning our structural engineer came on site to directly supervise the installation of all threaded rods/holdowns into the existing concrete. As shown on the picture - retrofitted sill place anchor bolts into existing concrete with the used of epoxy adhesives.

So Monday, which happened to be Columbus Day, was the official day for the completion of the foundation. The concrete mixer truck came at 3pm sharp. In about 7 minutes, the concrete was poured from the mixer truck into a concrete pumping truck that was connected to a long flexible pipe. The concrete then came out of the tube that was moved, by hand, and by a guy with a remote-control device hanging around his waist (to control the amt of flowing concrete), where a bunch of guys with various tools spread and smooth the concrete. It was quite fun to watch the whole process and indeed every efficient to transport large quantities of concrete over long distances. The last time I saw the process of filling in concrete was loonngg time ago back in Malaysia... using wheelbarrows and buckets. :-/ Shown below was one of the location to be filled with concrete. Can you recognize which part of the house is this? ... thanks to our decision regarding moving the toilet! So mUCh work! ...breaking the concrete, digging, excavating, piping, and finally filling in the concrete.... yes, it's the bathroom & the office! It looks like crap indeed.
After covering up all the pipes, they went ahead to fill in portion of the kitchen/garage foundation. Below is the picture of the foundation at the new addition area.It took them about 30 mins to finish 50% of the area, and another 30 mins to complete the other half.
Another 5-10mins to smooth out the whole area... there you go, our new foundation was done at 4:20pm on Monday! Total of 2 truckload concrete was used for our project. Apparently they dug 2 inches deeper than they should. So our new concrete foundation is 6" thick instead of 4".
I came back again in the evening to pick up mails... and this was how it looked on Monday late afternoon.
When I was about to leave... I saw this 'thing' hanging in the middle of the air at about one foot away from my face. !&%^!#$!@*!! It was a freaking HUGH spider!! The stomach was about an inch big! With the legS and all... it's about 2 inches wide!!! I HATE spider!! Of course... I 'sent him to heaven'.
When I got to the construction site the following day, around 10:45am. they already had the exterior framing done! No photos though... forgot to bring camera. :P But here's a photo of ChoonPing relaxing... after looking at the photos that I took last night.

Friday, October 10, 2008

2 weeks later

We started our renovation exactly 2 weeks ago. Now the demolition is done. The roof is off. And yes, the house looks like was just hit by a hurricane. The demolition actually didn't take very long. It probably took 2 days to strip the siding of the house. Removing the roof took another 2-3 days. So all in all slightly > 1 week for demolition.

With the roof off, the view is very nice. It's like a big skylight!

I lost count, I think we are now on our 4th load.


The front wall was demolished in about 2 days.


We have proceeded laying out new pipes for the house. Preparation work for the foundation has also been started.

Friday, September 26, 2008

Day 1 - Demolition

After all the preparation and moving this week. The demolition started today. Pictures were taken ~3 hours into the process.


The patio trellis has been removed.

Look at the picture before.

Thursday, September 18, 2008

Transplant

We are almost ready for our home renovation project. One of the most challenging thing is saving the plants. So last weekend we transplanted this 6ft tall Camelia plant in front of our house.

2 hours later...
Moved it into a pot! Hope it survives...